GoldFynch lets you easily add or remove tags for an individual file while viewing it in the Document viewer.
Adding an existing tag to a file
Step 1. Click on a file to open it in the Document Viewer
Step 2. Click on the 'Tag..' button in the Tag section of the right panel in the document viewer

Step 3. Click on a Tag from the Tags listed / Enter a tag name to filter the tags and then click on the tag from the list. Alternatively, you can choose a quick tag or a tag from the ones listed under Recently used/ Most used/ by clicking on it.
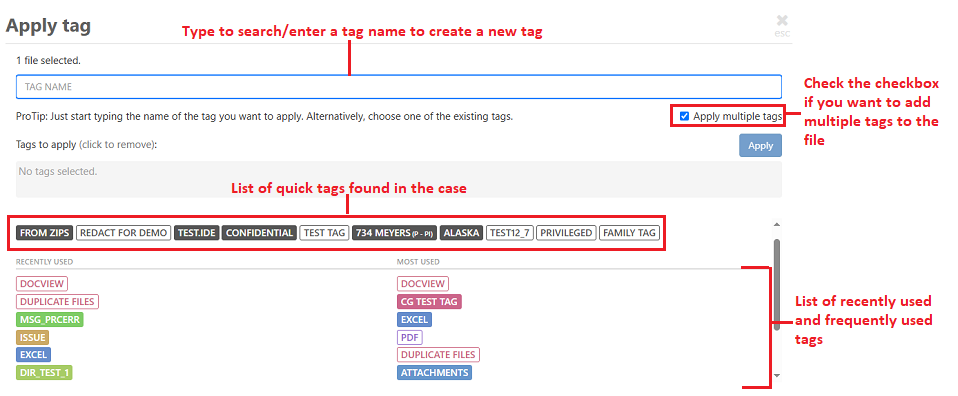
Step 4. (Optional) Check the 'Apply multiple tags' button if you want to add multiple tags to the document
Step 5. (Optional) Repeat Step 3 to add other tags to the document
Step 6. Click the 'Apply' button
Step 7. Select if you want to the apply the tag to the selected document or to all files in file family
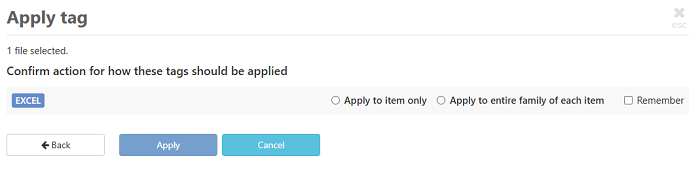
Step 8. Click on Apply
The tag will be applied to the document, and you will be able to see it in the tag section of the document viewer.

Note: You can also create a new tag when applying it from the document viewer. Learn how to do so here.
Adding a Quick tag from the Document Viewer
Adding a quick tag to a file from the document viewer is very simple; it can be done directly from the Tag section in the right panel. The process is given below:
Step 1. Click on a file to open it in the document viewer
Step 2. Click on any of the quick tags that are listed in the Tag section in the right panel to apply it to the open file

Note: Quick tags already assigned to the file will be highlighted; all others will be dimmed. In the image below, you can see that the tag 'From Zips' is highlighted, whereas all the other quick tags are dimmed. This indicates that the tag 'From Zips' is attached to the file

Removing a tag from a file
Removing a tag from a file in the document viewer is easy. Just click on the 'x' against the tag name in the Tag section to remove the assigned tag.

Select whether you want to remove the tag from the individual file or the file family, then click 'Remove'.

Note: For quick tags, just click the tag name to remove it.
Learn more about tagging and tag management
Tagging all your documents in a folder or search (bulk tagging)
Retroactively tagging families of already tagged files
Tagging all documents in a search results
Tag a document with multiple tags in one go
Removing tags from Unsupported documents
Tagging a file in a family, but not the whole family