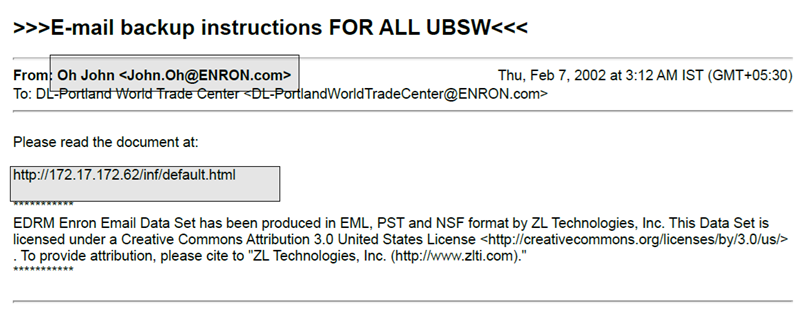
Redaction in GoldFynch
Redaction (also called sanitization) in GoldFynch is the process of removing sensitive information from a document before production.
- Redacted portions of text and images are covered by opaque boxes and are completely unrecoverable in the final produced document (i.e., the documents you give to the opposing counsel)
- In a native-only production, if a file or one of its ancestors has a redaction, that file will not be produced natively and will be produced in image form
- Within GoldFynch, redacted portions of documents remain visible and fully searchable. The areas marked for redaction appear as a translucent box over the text in the original file (so a new file with redactions is not created)
- While redacting portions of the document, you can add redaction stamps that let you identify why the text was redacted. The redaction stamp will be displayed on the opaque boxes in the final produced document.
NOTE: 'Native' documents in productions are those that were added as they were uploaded; as a result, they never have Bates or tag stamps added after upload to GoldFynch. Learn more about native files here.
How to Redact in Under 3 Minutes
Placing redactions
To mark parts of your documents for redaction, open the document you wish to redact in the Document Viewer. Depending on the version of the document viewer you have selected ("New viewer" by default), the process for drawing redactions will be slightly different. Here's where you can confirm which version of the viewer you have selected:

GoldFynch lets you mark either sections of a page with redaction boxes, or redact entire pages (or ranges of pages)
Redacting documents using the 'New document viewer' layout
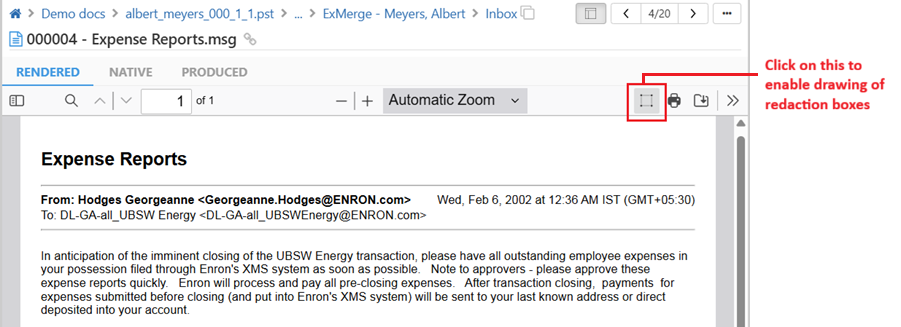
Step 1. Click on the 'Draw' button in the document viewer toolbar
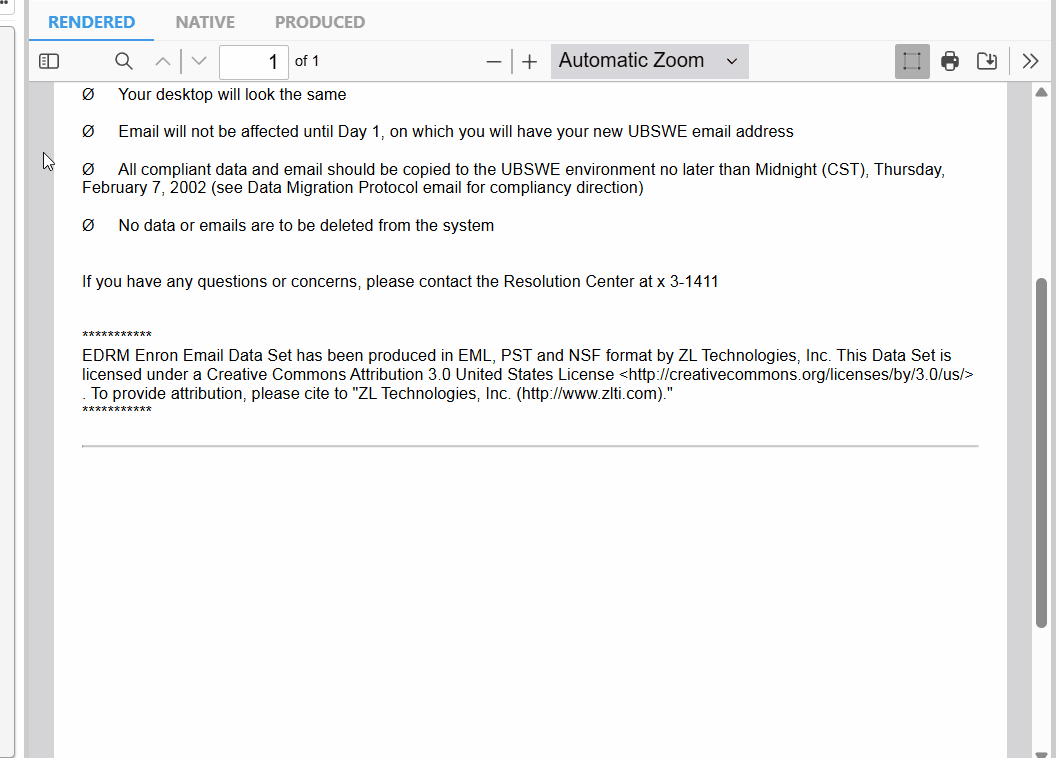
Step 2. Click and drag the mouse cursor to draw a box over the text you want to redact
Step 3. Click on the box you have drawn to view the redaction stamp pop-up
Step 4. Select one or more redaction stamps from the list or enter an on-the-fly redaction stamp
Step 5. Close the redaction stamp pop-up; the selected redaction stamps will be displayed in the box that you have drawn.
Step 6. Repeat Steps 2 -5 for all the redactions you want to draw
Step 7. Click on the 'Draw' button in the document viewer toolbar to deselect and stop redacting
Note: Learn more about adding redaction stamps to redactions and maintaining them
Redacting documents using the 'Older document viewer' layout
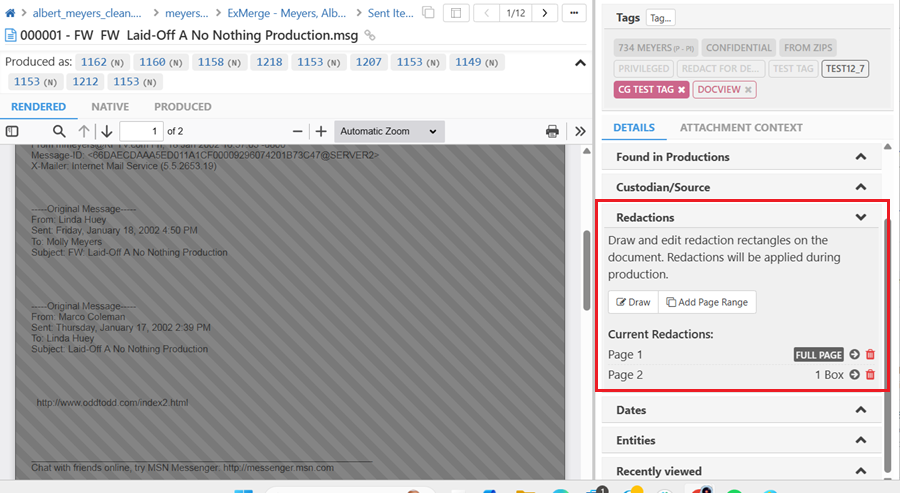
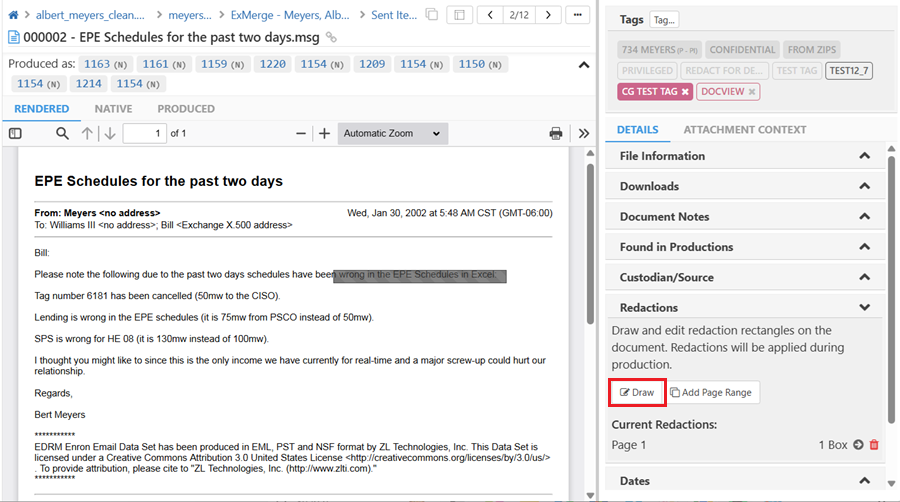
Step 1. Click on the "Draw" button under "Redactions" in the right panel.
Step 2. Click and, while holding the mouse button down, drag the cursor over the section of the document that you wish to redact.
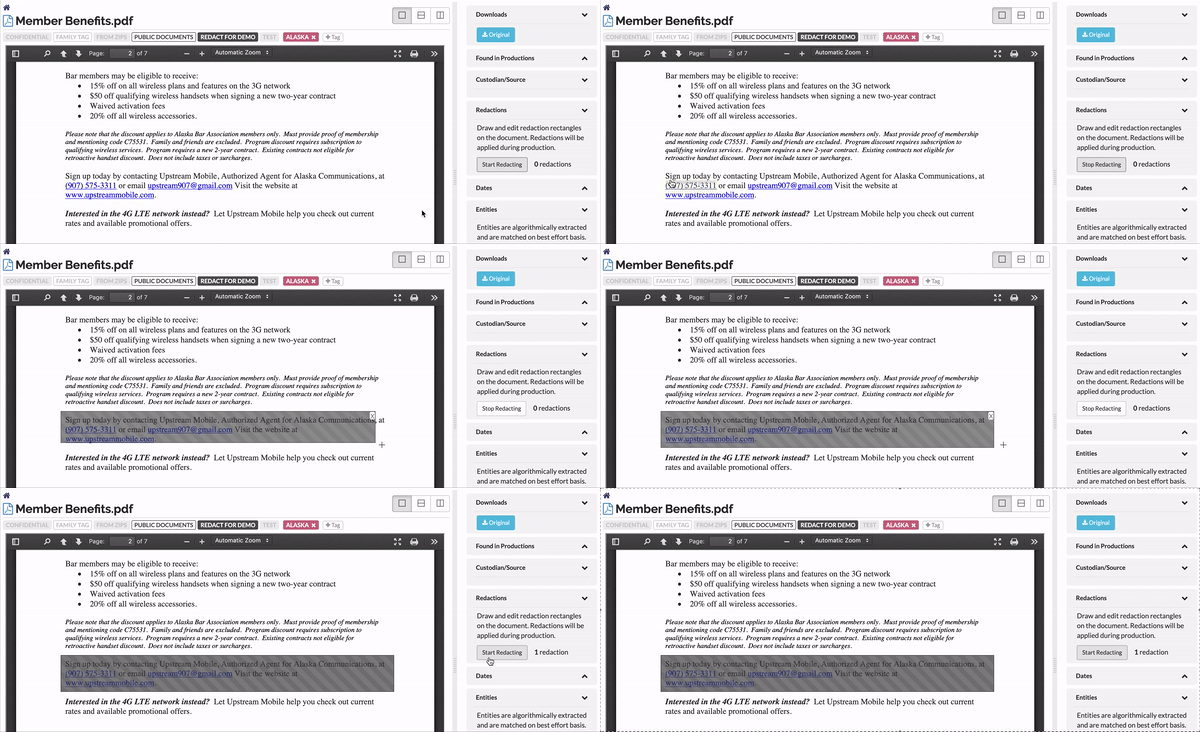
Step 3. Click on the "Stop Redacting" button.
Note: You cannot add redaction stamps using this version of the Document viewer
Whole-page and page-range redactions
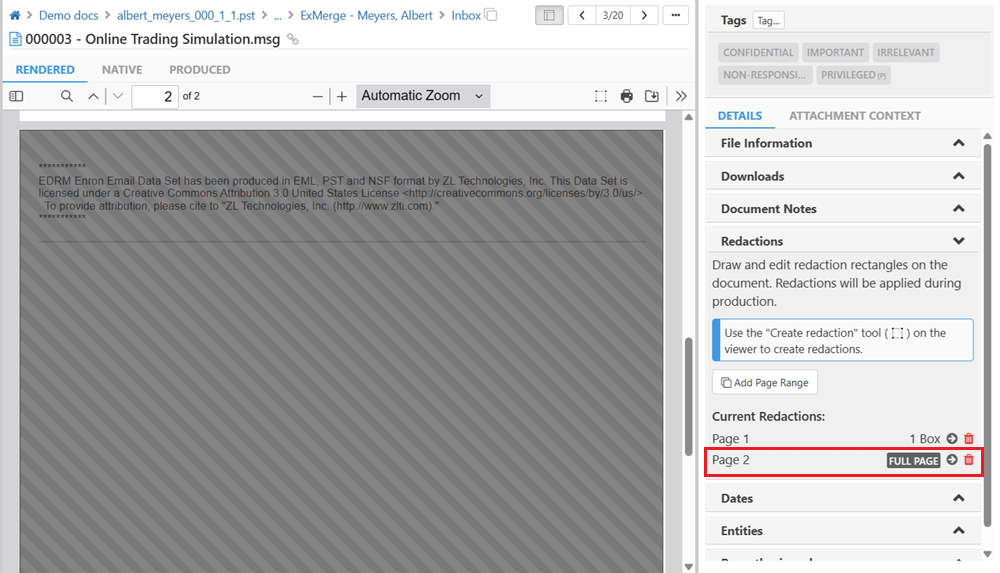
Instead of drawing boxes over full pages to redact them, you can easily redact entire pages or even page ranges using the 'Add Page Range' function found in the redaction function of the right action panel. These page-wise redactions are effectively identical to drawing a redaction box across the whole page, and as such will be affected by all production options that affect boxes generated using the 'Draw' option (e.g., redaction box color, redaction mode, etc.).
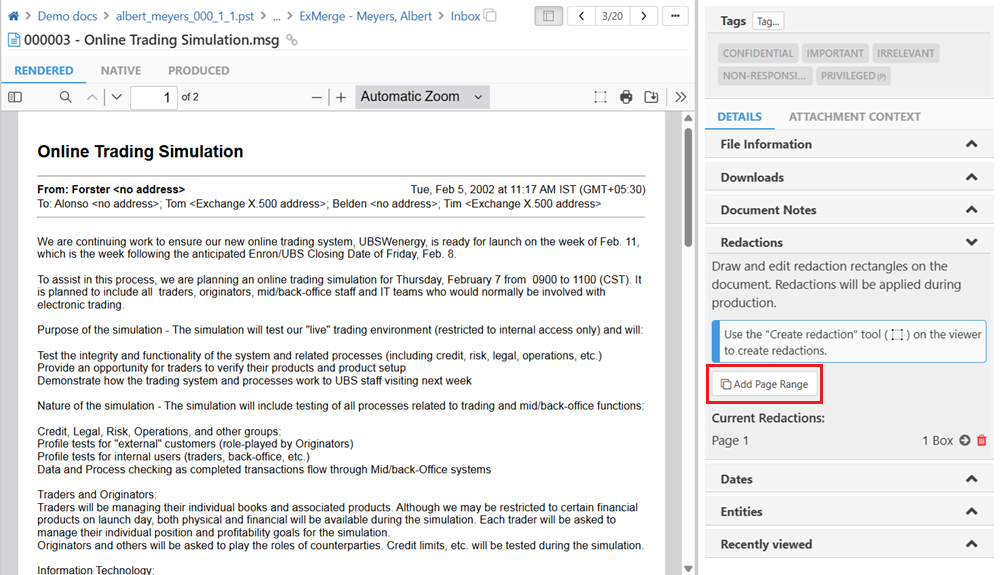
Step 1. Click on the "Add Page Range" button
Step 2. Enter a single page number, a range of pages, or a combination of both in the text box that appears. Separate each of these with commas. Make sure you do not leave a space after each comma.
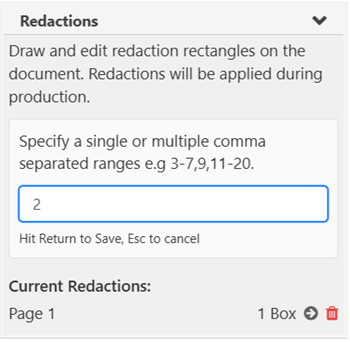
Step 3. Hit the Return key to save your redactions, or the Esc button to cancel the assignment.
Managing redactions
- To delete a page redaction, a page range, or all redaction boxes on a page, click on the trashcan icon against a line in the "Current Redactions" section of the Redactions box (visible when you are not in the 'edit' modes)
- To delete individual redaction boxes:
- When using the old document viewer layout,
- Click on the "Draw" button in the right action panel
- Then click the "X" symbol in the top-right corner of the redaction box
- Finally the "Stop Redacting" button to save the changes
- When using the new document viewer layout,
- Click on the draw redaction box in the document viewer toolbar
- Then click the trashcan icon in the top-right corner of the redaction box to delete
- Finally, deselect the draw redaction box in the toolbar to save the changes
- When using the old document viewer layout,
- To jump to a particular redaction in the Document Viewer, click on the arrow (next to the trashcan icon) against that redaction

Redactions in productions
Applying regular redactions
When you include files that contain redactions in your production, they will, by default, have the redactions applied. In the case of native-only productions, files with redactions, or those with ancestors that have redactions, will be produced in image format and not natively.
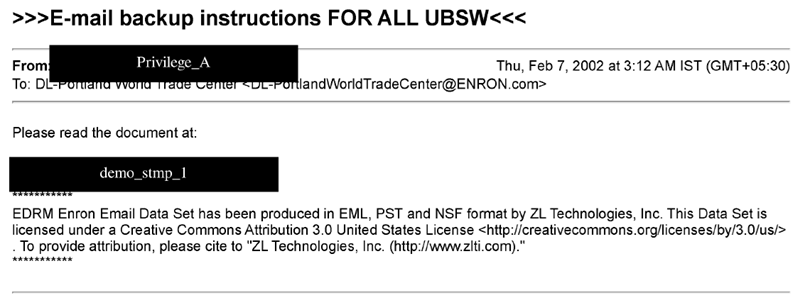
By default, the redactions applied are 'Final' redactions, which are opaque and render the content they cover unreadable and unsearchable. They can be set as:
- Black boxes
- White boxes with black borders
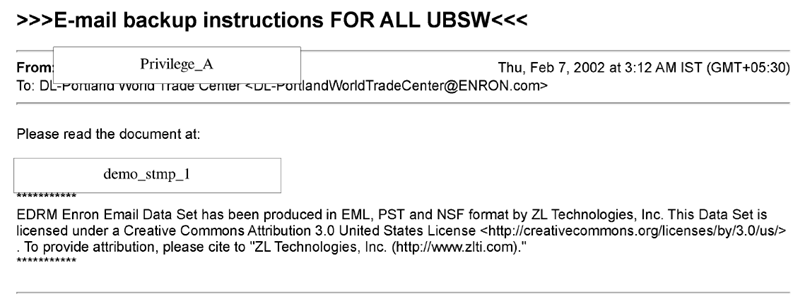
The redaction stamps that you applied will be written on the redaction boxes that are applied
Applying redaction 'previews'
Alternatively, the redaction mode can be set to 'Preview,' which renders redactions you have added as translucent grey boxes, leaving covered text still readable and searchable. Preview redactions are helpful for internal review and primarily serve to mark content that 'Final' redactions would cover if applied. Redaction stamps will not be written within the preview redaction boxes.