Tag notes
While tagging files in GoldFynch, you can attach ‘notes’ to the tags and quick tags you assign to files. This allows you to provide additional context for why a tag is being applied, or convey any other relevant information to the file(s).

Enabling tag notes for a tag
Tags do not collect notes by default. To enable note collection for a tag:
Step 1. Go to the ‘Tags’ view by clicking on the button in the left panel

Step 2. Click on the '...' icon against the tag that you wish to enable the behavior for - this will let you change its properties
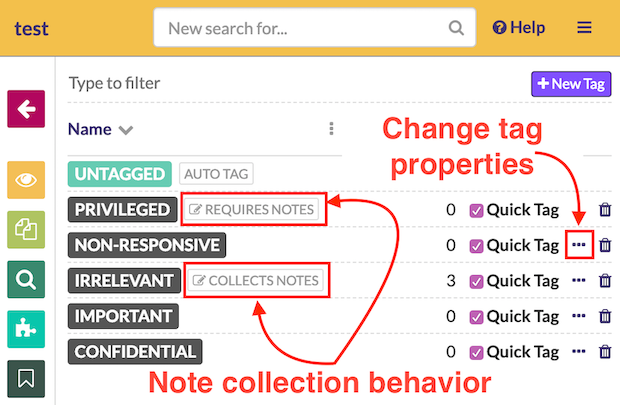
NOTE: Tags that collect notes have a visual indicator in the ‘Tags’ view
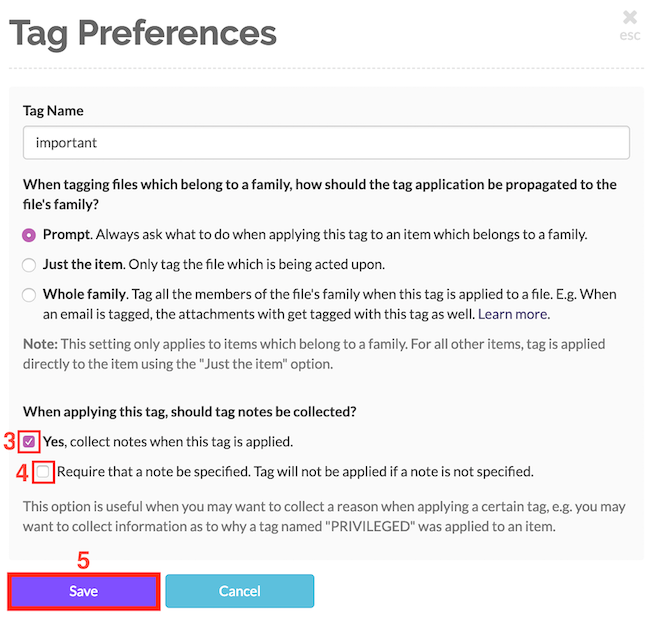
Step 3. Check the 'Yes, collect notes when this tag is applied.' checkbox
Step 4. (Optional) If you wish to make adding a note compulsory when a particular tag is added (e.g. PRIVILEGED,) check the 'Require that a note be specified. Tag will not be applied if a note is not specified.' checkbox.
Step 5. Click on the Save button
When a file is tagged with a tag that has a note attached to it, an icon is displayed alongside the tag’s name, as seen in the image below for the ‘Privileged,’ ‘Important,’ and ‘GoldFynch demo’ tags
Assigning tag notes
Tag notes are assigned to files on an individual basis. That means that the same tag can potentially have different notes for each separate file it is attached to. However, it is also easy to apply tag notes in bulk - just select multiple files when you are applying the tag.
Once you have enabled note collection for a tag, you can begin adding tag notes to your files. There are many different screens across GoldFynch from which you can apply tags, and when you apply a note-collecting tag on any of them you will be given a prompt as described below.
To assign the note:
Step 1. Assign a tag that collects notes to a file or multiple files using any of the methods listed here
Step 2. Enter the note that you wish to in the box that appears

Step 3. Click on the 'Continue' button
If you assign a tag that requires notes to a file, you will not be able to move beyond step 2 above until you enter a note; the Continue button will be unclickable. You will be able to tell that the tag requires a note by the 'REQUIRED' text.
NOTE: If you select more than one file while applying a note, all selected files which do not already have that tag with a note will be assigned the tag and the note you entered. Files which have notes for that tag will keep their original note.
When assigning multiple tags that require notes, you will be able to enter a separate note for each tag.

Viewing tag notes
To view a tag note in the 'Files' view, just hover the mouse cursor over the tag and the note will be displayed in a window.

In the ‘Docs’ view, all tags notes attached to the tags of a file are listed in the right panel:
